So this scarf is a little more extensive then the last one, but it can turn out really cute. You need to cut the shirt just like the last one (a rectangle shape). Now the more material you have, the longer the scarf should be. Mine is a little short since I had a small shirt to work with but the length is cute and still doable. This is my first one I have ever made so it is not perfect by all means.
First cut strips long ways on the shirt to make big circles of the material. I did not keep a consistent width of the fabric I was cutting since I like to do things quickly for the first time. The more strips you have, the longer the scarf will be.

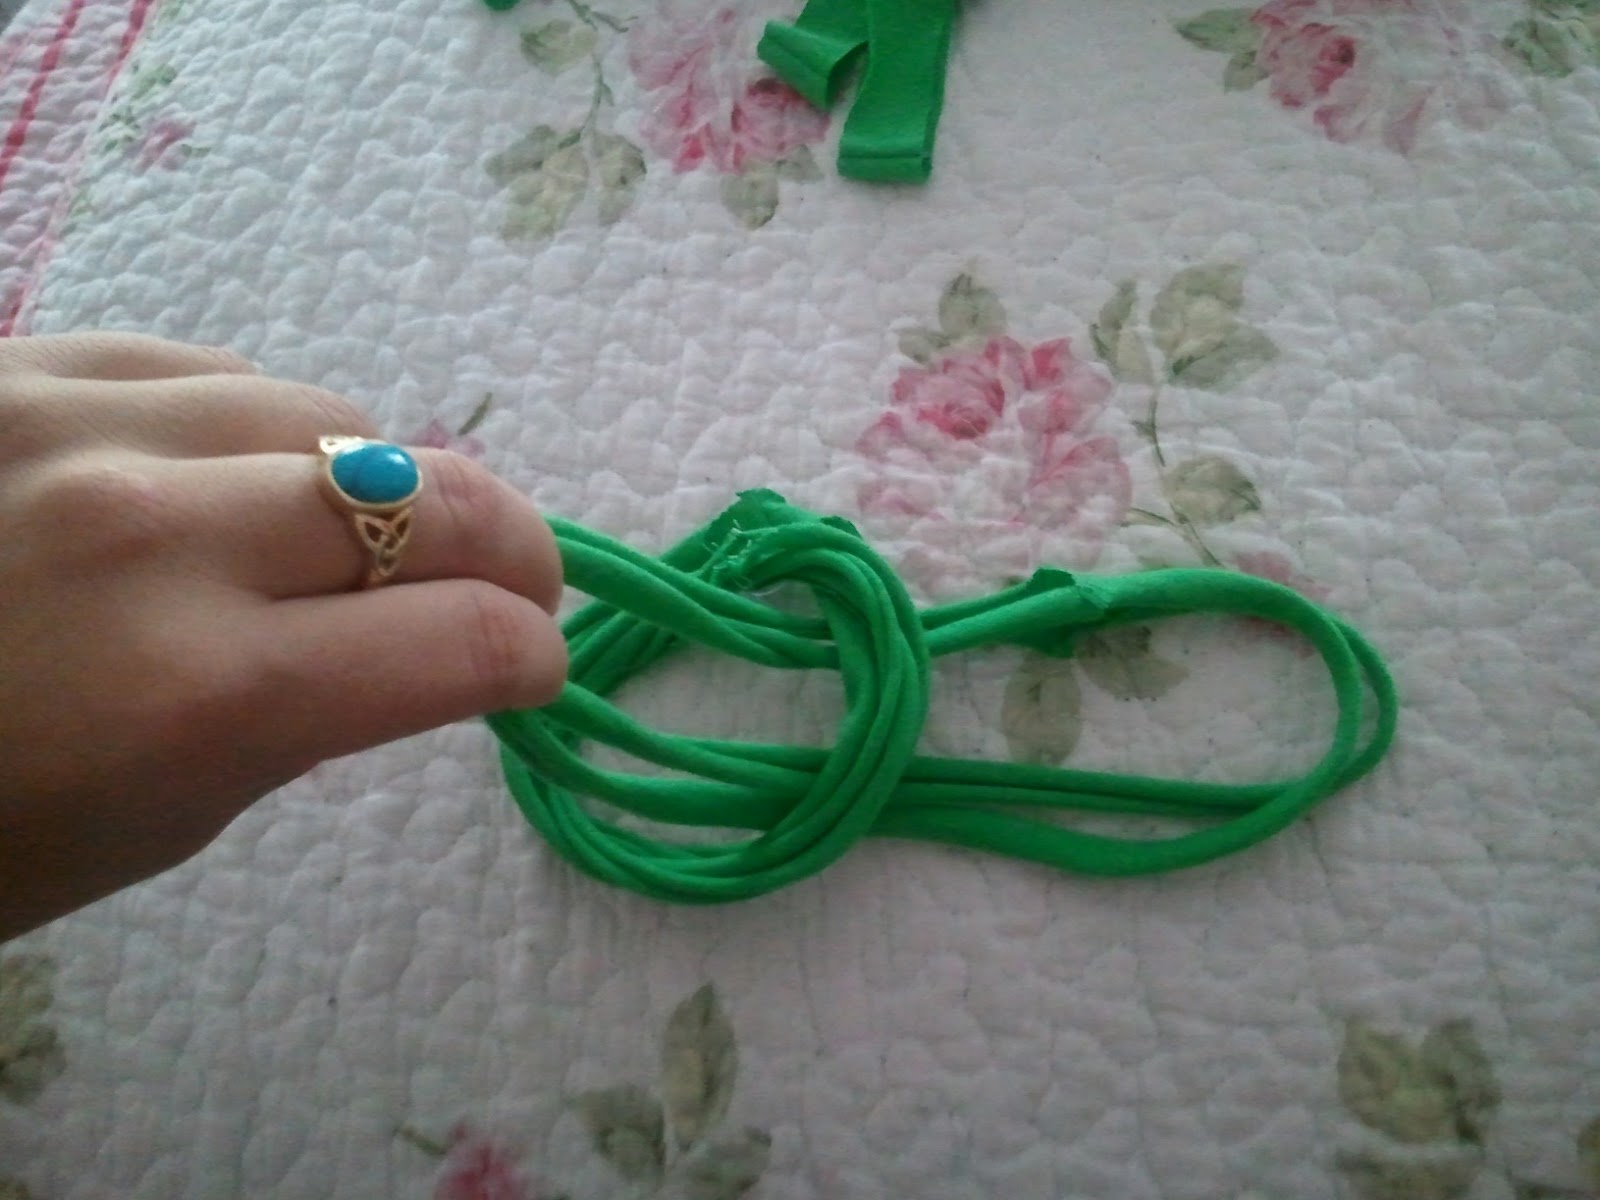
Once you have them, take one of the circular strips of material, and wrap it around four times. I did not do enough wraps, so depending on how long yours are, you may want to tweak the scarf after you put it together.

Next, take the next strip and wrap it half of the amount of the first one (again I went back and wrapped them more times. Follow the pictures below because it shows what to do better than what I can explain:


Do this last picture with each strip of fabric until you run out

When you reach the end, bring the two ends together, and use excess fabric (cut off the shoulder of the t-shirt or some other part that is just scrap) to tie the pieces together.

Again, mine is pretty short but here is what it looks like!


YAY! It is a really fun and pretty design! And if you want, you can always take it apart again and fix or tweak some parts you think would look better. I want to make a light pink one next time!
Thanks!
No comments:
Post a Comment